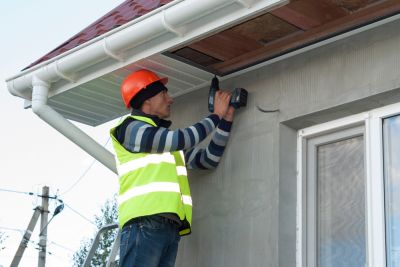
What Tools Are Required For Installing New Fascia Boards?


Upgrading the roof edge is a high-impact project because fascia boards anchor gutters, finish the eaves, and help keep water away from vulnerable structures. Choosing the correct tool set determines how cleanly boards fit, how well flashing ties in, and how long the finish lasts in real weather. It also affects safety, since most fascia work happens on ladders or staging. For property owners in, , understanding which tools are essential helps you plan the scope, evaluate bids, and spot quality workmanship. With the right approach, you can avoid damage to shingles, drip edge, and siding while achieving a crisp, durable roofline.
Tools Required for Installing New Fascia Boards
Start with layout and cutting tools that deliver accurate fits: a tape measure, speed square, chalk line, and a 4-ft or laser level for straight, true runs. A miter saw (or circular saw with a fine-tooth blade) handles precise crosscuts and miters; an oscillating multi-tool is invaluable for flush cuts at rafters and for removing stubborn trim. Material-specific cutters matter: aviation snips and a portable metal brake for aluminum coil wrap, and dedicated shears or carbide-tipped blades designed for fiber-cement to reduce dust and chipping. Keep a sharp block plane or sanding block to ease edges before finishing, and a moisture meter if installing wood—finishes typically bond best when lumber is under about 15% moisture. Round out the kit with layout pencils, a utility knife, and a pry bar/cat’s paw for careful demo without scarring roof components.
For fastening and weatherproofing, use a drill/driver and impact driver, exterior-grade screws, and galvanized or stainless ring-shank nails; a finish nailer speeds long runs on wood or PVC. A countersink bit or nail set allows filled, smooth finishes; a caulk gun with high-quality exterior sealant seals butt joints, end grain, and fastener heads. Tin snips and a hand seamer help detail drip edge; many jurisdictions following current residential codes require continuous drip edge and proper flashing at eaves and rakes, so plan to verify and replace compromised metal as needed. Access and safety gear are non-negotiable: an extension ladder with stabilizers, roof brackets or scaffolding, and an ANSI/OSHA-rated fall-arrest setup. Falls remain the leading cause of construction fatalities, so compliant fall protection at working heights and hearing/eye protection are part of a professional tool list, not optional add-ons.
Ready To Start Your Fascia Installation Project? The right tools—accurate layout equipment, clean-cutting saws, material-specific shears, code-correct flashing tools, and OSHA-compliant safety gear—turn a tricky roof-edge job into a durable upgrade. A local specialist in, will arrive equipped to make precise cuts, set true lines, and fasten with corrosion-resistant hardware for long service life. Expect clean seams, sealed end grain, and correctly integrated drip edge so gutters run straight and water goes where it should. Submit the contact form to request service from a local professional in your area and get a tool-ready plan for your fascia installation.